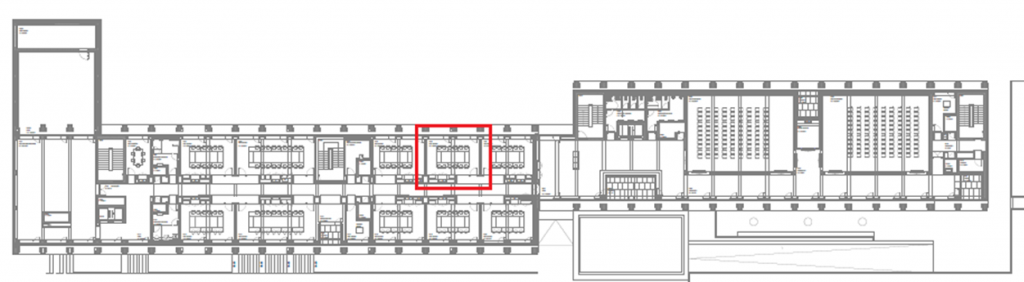
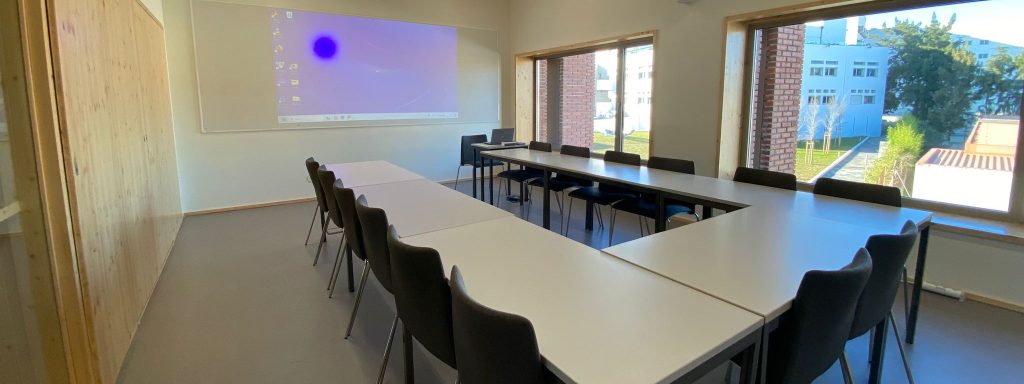
ED4-B322
OPERATIONS INSTRUCTIONS
1. Connect the computer to the wireless network (eduroam).
2. Connect the USB/USB-C cable available on the teacher’s desk to the computer.
3. Use the control system on the teacher’s desk to turn the video projector and camera on/off and to adjust the sound volume.
Tip: If the computer image does not appear on the screen, you should install the “DisplayLink USB Graphics” driver and give it the appropriate authorizations.
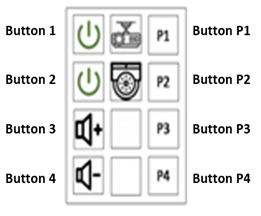
Button 1 – Turns the video projector on and off.
Button 2 – Turns the video camera on and off.
Buttons 3 and 4 – Adjust the sound volume.
Tip: In hybrid sessions (e.g. Zoom, Teams), the microphones and speakers of the other computers should be muted.
4. In hybrid sessions, use the P1, P2, P3 or P4 buttons to switch between four preset shooting scenarios.
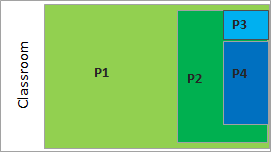
P1 Button – Captures almost the entire classroom.
P2 Button – Captures approximately half of the classroom.
P3 Button – Essentially captures the teacher’s seat.
P4 Button – Captures the whiteboard with better definition.
- Click on the “Mute / Enable audio” button on the meeting controls toolbar to mute or unmute the mic.
- Next to the “Mute / Enable audio” button, click on the “up arrow” icon and choose the last option: “Audio Settings…“, to test the speakers and microphones in the room.

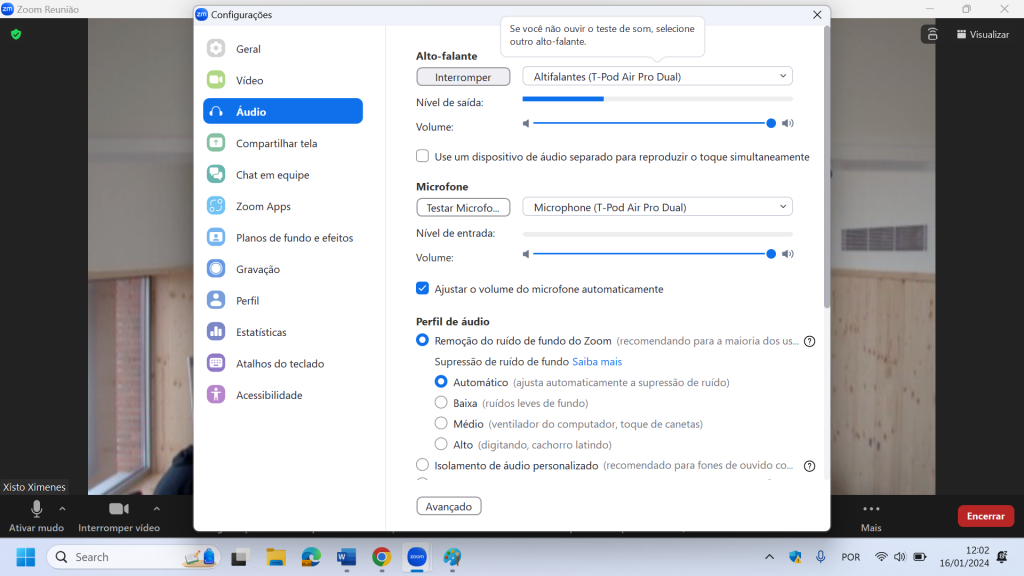
- Confirm that the room speakers (“T-pod Air Pro Dual“) are selected by default and click on “Test speakers“.
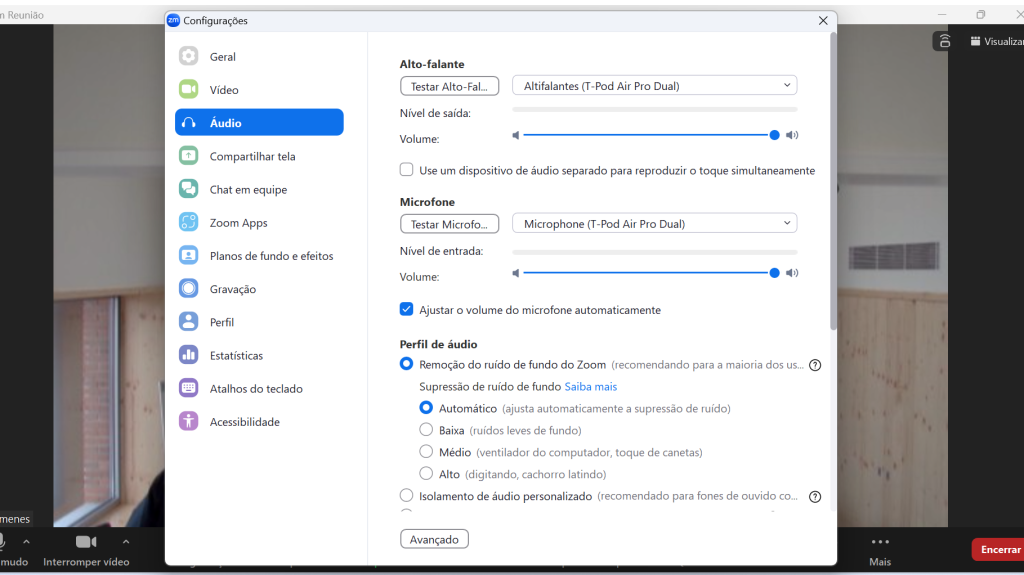
- Confirm that you hear a test tone from the speakers in the room. Adjust the volume by moving the corresponding button to the left (decrease) or right (increase). To end the test, click on “Stop“.
- Confirm that the room microphones (“T-Pod Air Pro Dual“) are selected by default and click on the “Test Mic” button.
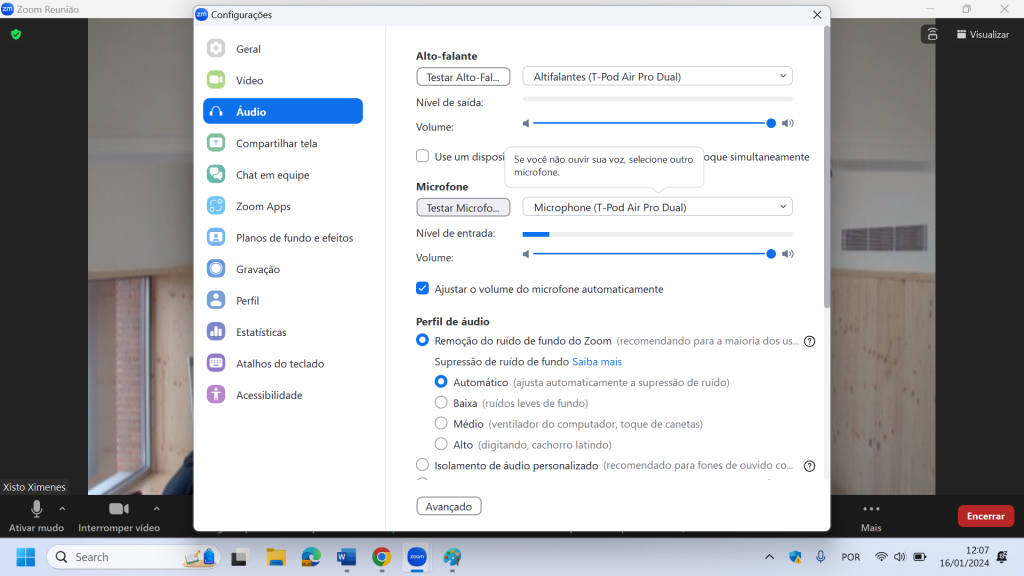
- To start testing the microphones, click on “Recording“.
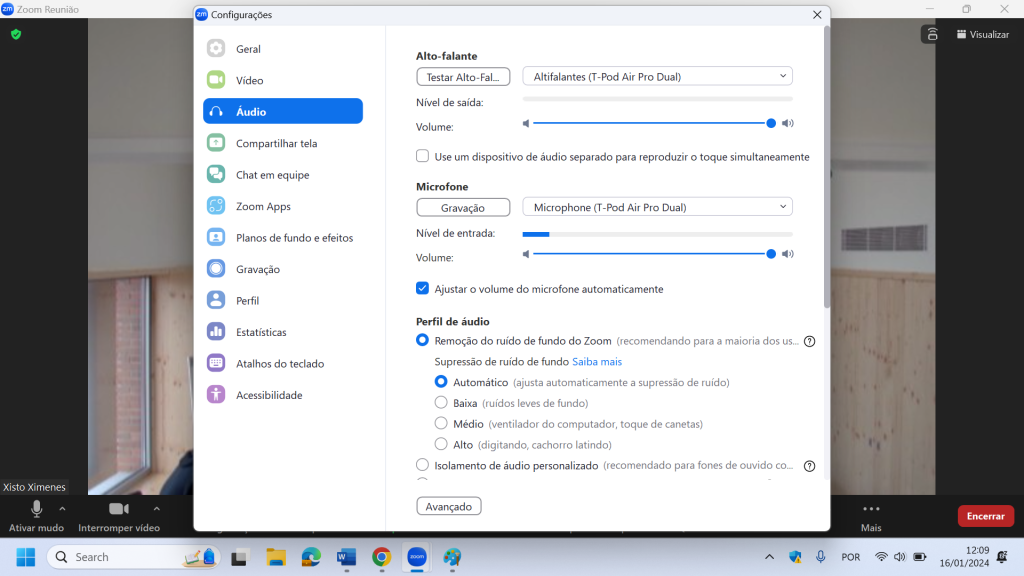
- Zoom starts recording the audio in the room. To do this, simulate a presentation by saying a few words. After a few seconds, Zoom will play back what has been recorded. During recording, you can check the input level. As with the speakers, you can adjust the pickup volume of the microphones by moving the corresponding button to the left (decrease) or right (increase).
- Close the “Settings” window.
Find out more about Colibri/Zoom
- Click on the “Start video / Stop video” button on the meeting controls toolbar to start or stop your video camera.
- Next to the “Start video / Stop video” button, click on the “up arrow” icon and choose the last option: “Video Settings…“, to test the room’s video camera.
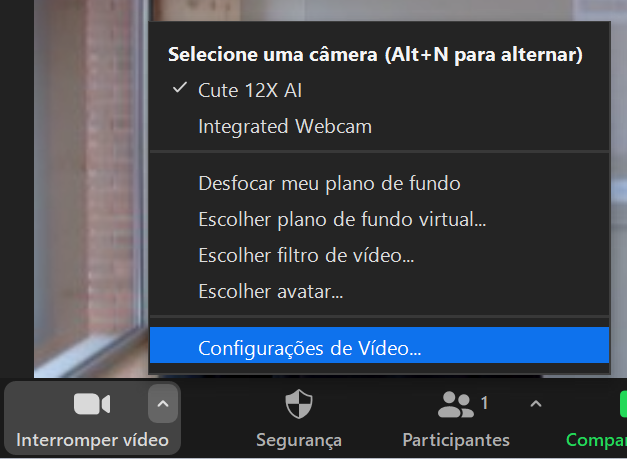
- Confirm that the room video camera (“Cute 12X AI“) is selected by default.
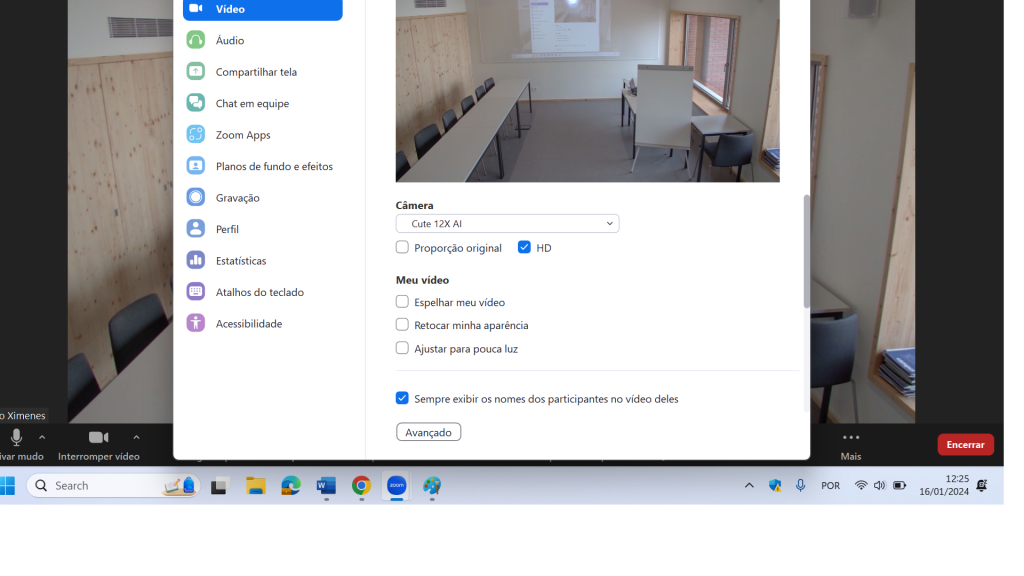
- Close the “Settings” window.
Find out more about Colibri/Zoom
The PowerPoint presenter view shows you the current slide, the next slide and your notes.
- Access the PowerPoint file.
- Select the “Slide Show” tab.
- Select the “Use Presenter View” checkbox.

Select on which monitor you want to display the “Presenter View”: “Automatic“.
Select “From Beginning” or press F5.

- Access the Zoom meeting window by maximizing it.
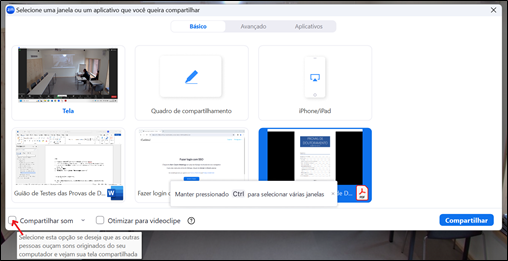
Click on the “Share Screen” button on the meeting controls toolbar.
- Choose “Screen 2“. ATTENTION: If the presentation involves playing multimedia content (audio and video) you must select the “Share sound” option, located in the bottom left-hand corner.
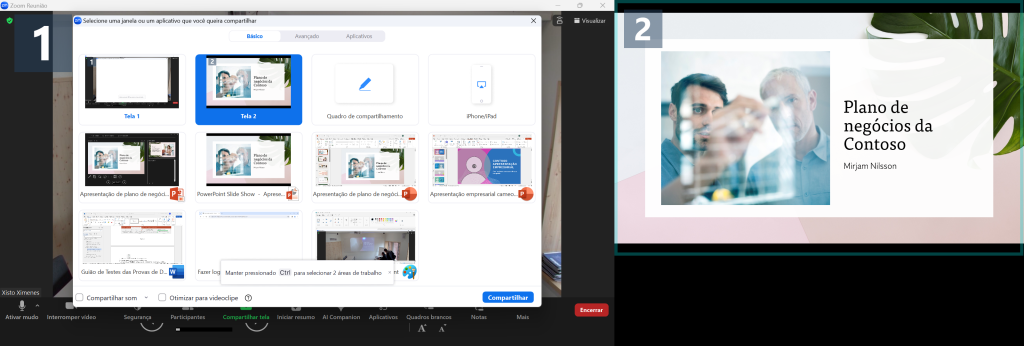
- At the end of the presentation, click on “Stop Share“
Find out more about Colibri/Zoom
- Access the PowerPoint file.
- Select the “Slide Show” tab.
- Select the “Use Presenter View” checkbox.

Select on which monitor you want to display the “Presenter View”: “Automatic“.
Select “From Beginning” or press F5.
- Access the Zoom meeting window by maximizing it.
- Click on the “Share Screen” button on the meeting controls toolbar.
Choose “Powerpoint Slide Show” and click on “Share”. ATTENTION: If the presentation involves playing multimedia content (audio and video) you must select the “Share sound” option, located in the bottom left-hand corner.
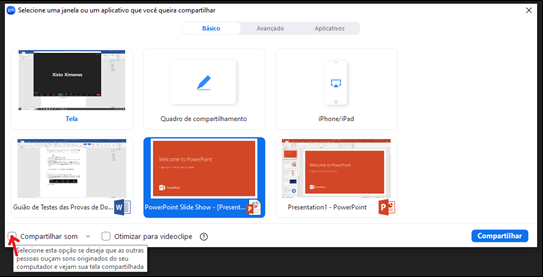
At the end of the presentation, click on “Stop Share“.
Find out more about Colibri/Zoom
- Access the PDF file, preferably using Acrobat Reader.
- Press the CTRL and L (CTRL+L) keys simultaneously to activate the presentation view.
- Click on the “Share Screen” button on the meeting controls toolbar.
- Choose “PDF” and click on “Share“. ATTENTION: If the presentation involves playing multimedia content (audio and video) you must select the “Share sound” option, located in the bottom left-hand corner.
- At the end of the presentation, click on “Stop Share“.
Find out more about Colibri/Zoom
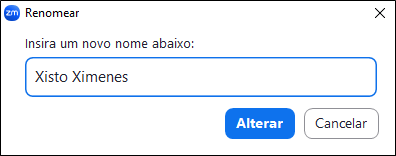
- Click on the “Participants” button on the meeting controls toolbar.

- Hover over your name and click on the ellipsis “…“.

- Click on “Rename”.

- Type your name and click on “Change”.
Find out more about Colibri/Zoom