Tips for Meetings, Classes, and Lectures (seminars, workshops)
2025-Dec-Wed
Enhance and customize your meeting experience in Teams.
Scheduling Classes and Lectures
When scheduling online classes or lectures, apply the default settings:
- Class → ideal for groups, with permission control (teacher as presenter, students as participants). How?
- Select “Calendar” in Teams.
- Select “New” + > “Class”.
- Add the meeting title, start and end times, and other details.
- Select “Save” after adding all the meeting details.
- Lecture (seminar) → for presentation sessions, where only presenters speak and participants are in audience mode. How?
- Select “Calendar” in Teams.
- Select “New” + > “Lecture”.
- Add the meeting title, start and end times, and other details.
- Select “Save” after adding all the meeting details.
- Class → ideal for groups, with permission control (teacher as presenter, students as participants). How?
Reschedule a meeting
Reschedule meetings and events from your Teams calendar. To quickly update a meeting time, select it in your Teams calendar, drag it to a new time, and drop it.
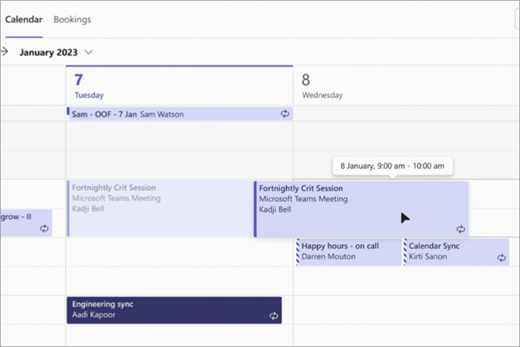
You will be notified of guests’ availability before updating the meeting time.
You can also change the meeting time by opening the meeting details, choosing a new time, and selecting “Send update.” Participants will automatically receive a notification with the updated time.
Change the “Show as” status
As the organizer, you can set the “Show As” status of the meeting in the action bar. When participants RSVP (a tool that allows them to confirm their attendance at meetings and events within Teams), their status will automatically reflect the status set by the organizer. To set the “Show as” option:
- Select “Show as” in the meeting details.
- Select the status you want participants to have while they are in your meeting.
Tips:
- Participants can choose a different “Show as” status by right-clicking on the meeting in their Teams calendar, hovering over “Show as” and selecting a status.
- The default value for the “Show As” status for all meetings is “Busy”.
Presenter controls
The toolbar is only visible to the person presenting.

- Drag handle: Select and hold the toolbar drag handle to move the presenter toolbar. This will keep it from blocking important parts of your screen. Release the drag handle when you’ve placed it in the right area.
- Camera: Turn the camera on/off.
- Mic: Turn the mic on/off.
- Give control: Let someone access and interact with your screen. While they have control, they can make selections, edits, and other modifications on your shared screen.
- Take back: If you gave someone control, select “Take back” when you’re ready to take back control.
- Share audio: To stream audio from your device to meeting participants through Teams. All sound from your computer, including notifications, will be audible in the meeting.
- Optimize: To prevent choppiness or lag while sharing video content.
- Layout:
- Content only: participants will see your content and video feed.
- Standout: this blocks your background and helps you stand out in your video feed.
- Side-by-side: the user and another participant will be placed side-by-side in the meeting window.
- Annotate: to lock what’s on your screen while you and other people draw or add notes over the content.
- Chat: to view and participate in a compact view of the meeting chat while you’re presenting content. Your audience won’t see the chat window in your shared screen.
- People: While you present, a minimized meeting window will appear next to your shared content. Select “People” to see other people in your meeting.
- Stop sharing: to stop sharing your screen and return to the main meeting window.
- Pin: to keep the toolbar in the place you’ve positioned it.
Use PowerPoint Live
PowerPoint Live in Teams helps presenters give their audience an inclusive, engaging experience. It combines the best parts of presenting in PowerPoint with the collaboration of a Microsoft Teams meeting.
- Presenters have a unique view that lets them control their presentation while staying engaged with their audience.
- Audience members can go through slides on their own without affecting the live presentation. They can also customize their viewing experiences with captions, high-contrast slides, and translated slides.
- See how
 here.
here.
Record a meeting
Start recording
To start a meeting recording:
- Start or join the meeting.
- ii. In your meeting controls, select “More actions ” > “Record and transcribe ”> “Start recording ”.
- Select “Confirm”.
Tips:
- Recording continues even if the person who started the recording leaves the meeting.
- The recording stops automatically once everyone leaves the meeting. If someone forgets to leave, the recording will end and automatically restart every four hours until the last participant leaves the meeting.
- If one of the participants has a policy for compliance recording, the meeting will be recorded according to the policy even if that participant is from another org.
To record audio only:
- Select “More actions ” in your meeting controls.
- Select “Record and transcribe ”> “Start recording ”.
- From the “Choose what to record” dropdown menu, select “Audio only”.
- Select “Confirm”.
Stop recording
- a. In the meeting controls, select “More actions ” > “Record and transcribe ”.
- Choose one of the following:
- “Stop recording” to stop the recording and live transcription.
- “Stop transcription” to stop the live transcription only. The recording will continue until you select “Stop recording”.
Find recordings
- The recording is processed and saved in the meeting organizer’s OneDrive.
- When a recording becomes available, the meeting organizer will receive an email. The recording will be posted in the meeting chat or channel
- Guests and external participants can only view the recording if it is explicitly shared with them
Choose who can record and transcribe
- Organizers, co-organizers, and presenters.
- To choose who can record and transcribe – Classic calendar:
- i. Select “Calendar” in Teams.
- i. Select a meeting or event.
- i. Select “Edit”.
- iv. In the meeting description, press and hold “Ctrl” and select “Meeting options”.
- In “Recording and transcription”, choose your preference in the “Who can record and transcribe” dropdown menu.
- Select “Save”.
Tip: People from other organizations, guests, and anonymous users cannot start or stop recording.
Privacy
- All meeting participants will receive a notification in their Teams desktop, web, or mobile app as soon as a meeting recording starts.
- The meeting organizer automatically owns the recording. By default, only meeting organizers and co-organizers can download or delete the recording.
Learn more…
(content from external sources provided by Microsoft)
![]() Microsoft Teams: The Ultimate Guide for Meetings & Collaboration
Microsoft Teams: The Ultimate Guide for Meetings & Collaboration
![]() How to make meetings more accessible and inclusive
How to make meetings more accessible and inclusive
![]() How to use Whiteboard in Meetings
How to use Whiteboard in Meetings
![]() How to use Collaborative Annotations in a meeting
How to use Collaborative Annotations in a meeting
![]() Tips for safe and effective meetings
Tips for safe and effective meetings
Visit the training modules we have prepared (based on external content provided by Microsoft)
- Faculty: Hybrid Teaching
- Staff: Communication and Productivity
- Students: Basic Concepts